In SAP PM, when there is a malfunction of any of the equipment, which requires a response from Maintenance team, the process of correcting this situation is known as Breakdown maintenance. Breakdown maintenance is required in the following situations −
Equipment is not working properly.
Production is affected when a technical equipment breaks down.
You create a M2 malfunction notification and PM02 order type and equipment is repaired at the site. In breakdown maintenance, you use catalogs and codes in notification.
Creating a Notification
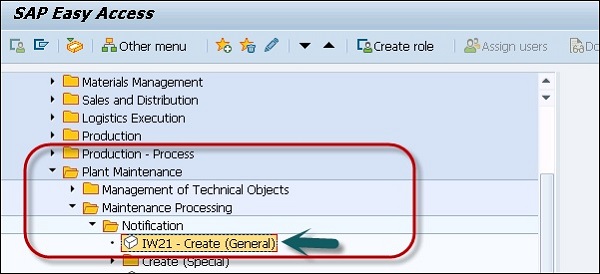
Step 1 − To create a notification, navigate to Logistics → Plant Maintenance → Maintenance Processing → Notifications → Create or use T-code − IW21
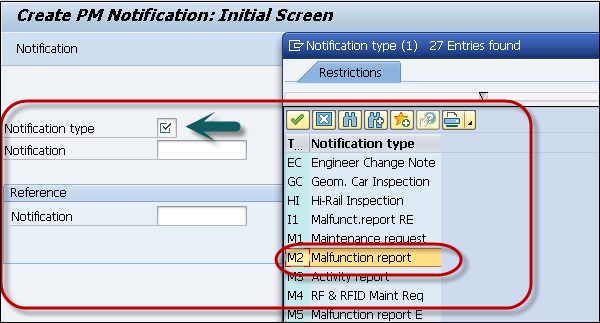
Step 2 − Click Create Notification and you will be prompted to select a Notification type.
Step 3 − Click to get the dropdown list and select the field. Select the notification type as M2 − Malfunction report
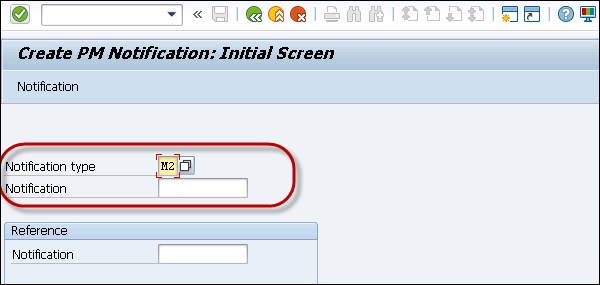
As the system is to be configured for internal notification, there is no need to enter any other information.
Step 4 − Click the tick mark at the top.
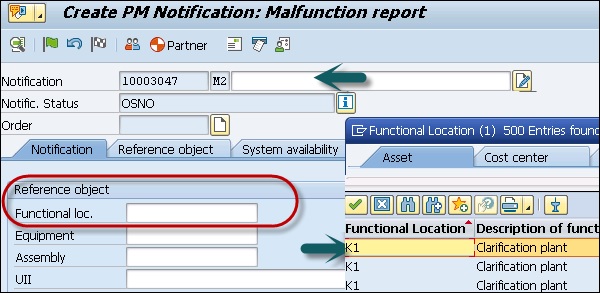
Step 5 − In the next window, enter the notification description. To get the functional location, go to the functional location field and search from the available list.
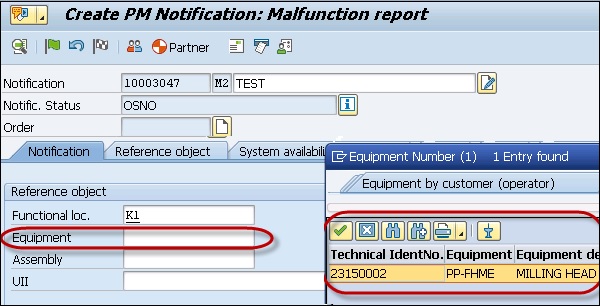
Step 6 − Next is to select the Equipment. Select the Equipment number by technical Id number and click the tick mark button to populate this.
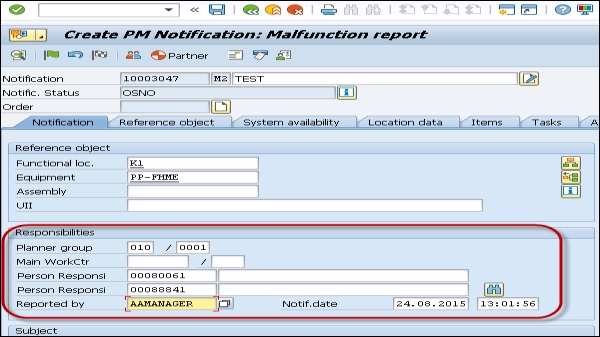
Step 7 − Enter the value for the following fields −
- Planner group field
- Main WorkCtr. field
- Person respons. Field
- Reported by field
- Subject Long Text field
Step 8 − Once you enter all the fields, click the green tick mark at the top.
Step 9 − To save the notification, click the Save button.

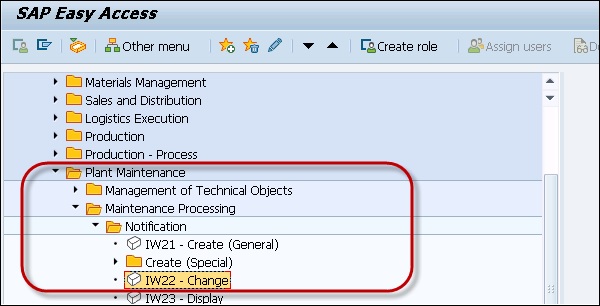
Changing the Notification
To change the notification, go to Logistics → Plant Maintenance → Maintenance Processing → Notifications → Change or use T-code − IW22
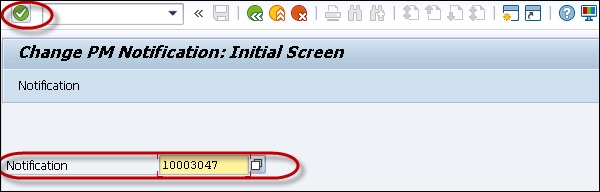
Enter the notification number and click the tick mark at the top.
Creating Breakdown Order for Notification
Step 1 − To create a breakdown maintenance order for notification, navigate to Logistics → Plant Maintenance → Maintenance Processing → Order → Create (Special) → Order the notification.
Or use T-code − IW34
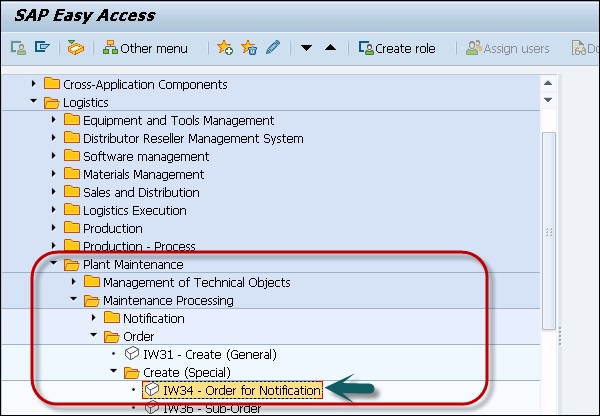
Step 2 − Enter the notification number.
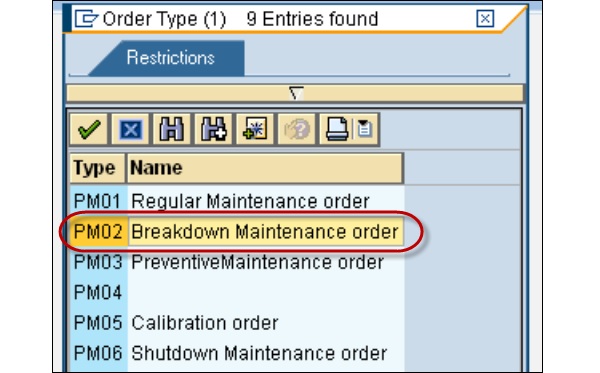
Step 3 − Select the order type as PM02 Breakdown Maintenance Order.
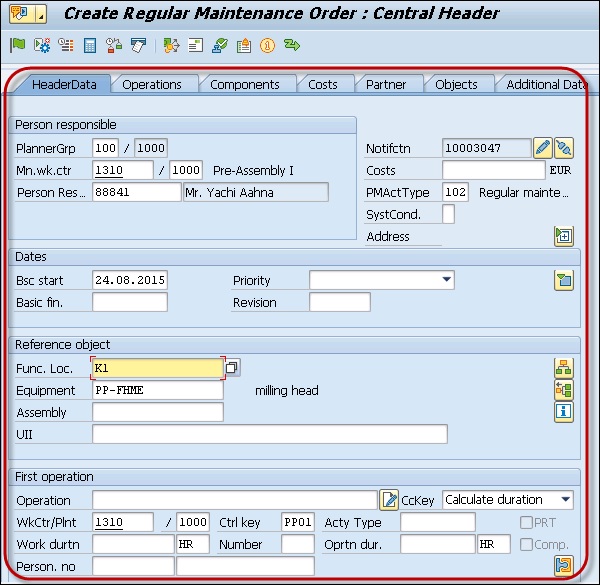
Step 4 − Once you enter the details, click the tick mark at the top.

Step 5 − Key in all the positions in Header data.
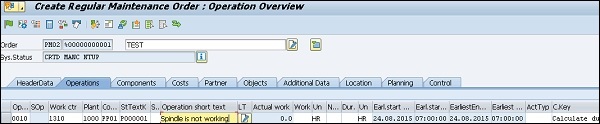
Step 6 − Go to Operations tab and enter all the details. Add other operations as required.
Step 7 − Click the Component tab to assign components that are required for the operations.
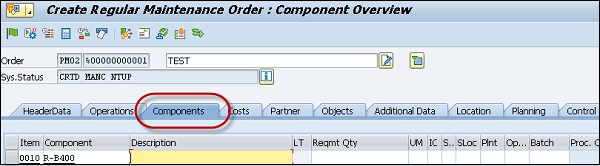
Step 8 − Enter the following details as shown in the screenshot.
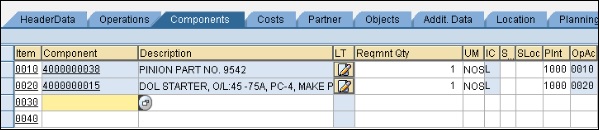
Step 9 − Select both the component entries and click on the icon shown in the following screenshot to check material availability.

Step 10 − To enter procurement of external services, go to Operations tab and click the EXTERNAL button at the bottom.

Step 11 − Click the green tick mark to validate the order. To save the order, click the Save button at the top.
No comments:
Post a Comment